Introduction: The Magic of Growing Plants from Cuttings
Imagine transforming a single branch from your favorite houseplant or garden shrub into an entirely new plant. Sound too good to be true? It’s not. Growing plants from cuttings is one of the most rewarding and cost-effective gardening techniques available to both beginners and experienced gardeners alike.
Whether you want to multiply your beloved pothos plant, create a garden full of fragrant rosemary, or share your favorite flowering shrub with friends and family, propagating plants from cuttings opens up endless possibilities. This method of plant propagation bypasses seeds entirely, allowing you to clone an exact genetic copy of the parent plant. This means your new plants will have identical characteristics to the original—same growth habits, flower colors, and leaf patterns.
Beyond the practical benefits, there’s something deeply satisfying about nurturing a tiny cutting through its journey toward becoming a fully mature plant. It’s a window into the incredible resilience and regenerative power of nature. Plus, growing plants from cuttings costs a fraction of what you’d pay for nursery plants, making it perfect if you’re building a garden on a budget.
In this comprehensive guide, we’ll walk you through everything you need to know about growing plants from cuttings, from selecting the right materials and timing to troubleshooting common problems and caring for your new plants as they mature.
Why Growing Plants from Cuttings Matters
Understanding the advantages of this propagation method will help you appreciate why so many gardeners rely on it:
Genetic Consistency: When you grow plants from cuttings, you’re essentially creating a clone. Every characteristic of the parent plant—growth rate, flower color, disease resistance, and leaf variegation—transfers directly to the new plant. This predictability is invaluable if you’re trying to recreate a specific variety.
Speed: Propagating from cuttings typically produces mature plants much faster than starting from seed. Many cuttings develop roots within weeks, not months.
Cost Efficiency: Rather than purchasing multiple plants from a nursery, one healthy parent plant can produce dozens of new plants over time.
Accessibility: Most gardeners already have suitable plant material in their own homes and gardens, making this method highly accessible.
Plant Preservation: If you have a favorite heirloom or heritage variety, propagating from cuttings ensures you’ll never lose that particular plant.
Understanding the Types of Cuttings
Not all cuttings are created equal. Different plants and different growing conditions require different types of cuttings. Understanding these categories will set you up for success.
Softwood Cuttings
Softwood cuttings come from new, tender growth that hasn’t yet become woody. These cuttings are flexible and pliable, bending without snapping. They typically appear lighter in color and have fresh-looking leaves.
Softwood cuttings have several advantages: they root quickly, often within one to three weeks, and they have high success rates. However, they’re also more delicate and prone to drying out or rotting if conditions aren’t ideal.
The best time to harvest softwood cuttings is in spring or early summer when plants are actively growing. Common plants suitable for softwood cuttings include poinsettia, coleus, impatiens, and most tender houseplants.
Semi-Hardwood Cuttings
Semi-hardwood cuttings come from growth that has begun to firm up but hasn’t fully matured. The base of these cuttings feels slightly woody, but the tips remain tender. This is the middle ground between softwood and hardwood cuttings.
These cuttings take longer to root than softwood varieties—typically three to eight weeks—but they’re more resilient and less prone to wilting. They’re ideal for many ornamental shrubs and some woody houseplants.
Mid to late summer is the optimal time for semi-hardwood cuttings, when plants have put on new growth but are beginning to harden off as temperatures cool.
Hardwood Cuttings
Hardwood cuttings come from fully mature, woody growth. They feel stiff and difficult to bend, and they’re often brown or gray in color. While these cuttings take the longest to root—sometimes three to six months—they’re the most durable and require less fussy care.
Hardwood cuttings excel in situations where you’re working with deciduous shrubs, trees, or other woody plants. Winter is typically the best time to take hardwood cuttings, when plants are dormant and full of stored energy.
Essential Supplies for Growing Plants from Cuttings
Before you start snipping away, gather these essential materials to ensure your cuttings have the best chance of success.
A Sharp, Clean Cutting Tool: Use pruning shears, a sharp knife, or scissors that are sterilized with rubbing alcohol or a 10% bleach solution. Dull blades tear plant tissue and create wounds that are prone to disease.
Rooting Hormone: This isn’t absolutely necessary—many cuttings will root on their own—but rooting hormone powder or liquid dramatically increases success rates, especially for difficult-to-root plants. It contains plant hormones that stimulate root development.
Growing Medium: Rooting medium should be light, well-draining, and sterile. Quality options include perlite, coarse sand, rockwool, coconut coir, or a mixture of peat moss and perlite. Avoid regular potting soil, which retains too much moisture and can cause rotting.
Containers: Small pots, seed trays, or even clear containers work well. Containers should have drainage holes and be clean and sterile.
Humidity Control: A clear plastic bag, plastic wrap, or propagation dome creates the humid environment cuttings need to thrive.
Spray Bottle: Keep your rooting medium consistently moist but not waterlogged with regular misting.
Grow Lights (optional): If you’re propagating during winter or don’t have bright natural light, grow lights help cuttings develop strong roots and shoots.
Step-by-Step Guide to Growing Plants from Cuttings
Step 1: Select Your Parent Plant
Choose a healthy, disease-free parent plant. The better the health of the original plant, the higher your success rate. Avoid plants that are stressed, diseased, or showing signs of pest infestation.
If possible, select plants that are in their active growing season. Plants that are dormant or stressed are less likely to produce successful cuttings.
Step 2: Take Your Cuttings at the Right Time
Timing is everything when growing plants from cuttings. For most plants, the best time is early morning when stems are fully hydrated and turgid. This gives cuttings maximum moisture content right from the start.
Take cuttings from healthy stems located in the upper portions of the plant. Avoid diseased areas, flower buds, or damaged growth.
Step 3: Prepare Your Cuttings
Cut your cuttings to the proper length. Most cuttings should be 3 to 6 inches long, containing at least two to three leaf nodes (the bumpy areas where leaves emerge). More leaf nodes mean more potential rooting sites.
Make your cut just below a leaf node at a 45-degree angle. This angled cut provides more surface area for water absorption and root development. Remove any leaves from the bottom third of the cutting—these would sit below the soil surface and could rot, promoting disease.
If you’re using rooting hormone, now is the time to apply it. Moisten the bottom inch of the cutting and dip it into rooting hormone powder, tapping away the excess. If using liquid rooting hormone, follow package directions.
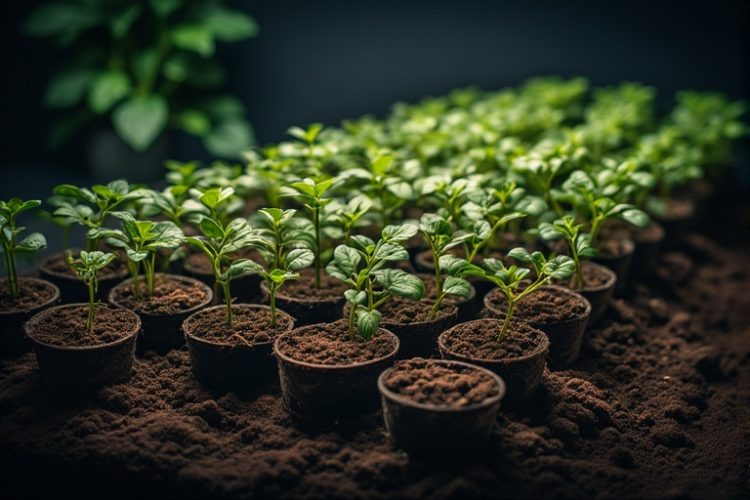
Step 4: Prepare Your Growing Medium and Containers
Fill your containers with moist (but not soggy) rooting medium. Dampen the medium before inserting cuttings, but ensure it’s not waterlogged. Excess moisture is the primary enemy when growing plants from cuttings.
Make a small hole with your finger or a stick in the rooting medium where you’ll insert the cutting. This prevents the rooting hormone from being scraped off as you push the cutting into dense medium.
Step 5: Insert Cuttings and Create Humidity
Gently insert the cutting into the hole, pressing the rooting medium around it firmly enough that the cutting stands upright but not so firmly that you damage tender tissue.
Water the medium lightly. The key is keeping it moist without being soggy—think of the consistency of a well-wrung sponge.
Cover the container with a clear plastic bag, plastic wrap, or propagation dome. This creates a humid microclimate that reduces water loss from the delicate cutting. Make sure the plastic doesn’t touch the leaves, as this can promote fungal disease. Insert stakes or sticks around the container edges to keep the plastic from collapsing onto the cuttings.
Step 6: Provide the Right Light and Temperature
Place your cuttings in bright, indirect light. A windowsill with filtered light works perfectly. Avoid direct, intense sunlight, which can heat the plastic covering and damage the cuttings.
Maintain temperatures between 65 and 75 degrees Fahrenheit for most plants. Bottom heat (using a heat mat) can speed up rooting by several weeks, particularly for tropical or difficult-to-root species.
Step 7: Monitor and Maintain
Check your cuttings every few days. The rooting medium should remain consistently moist but never waterlogged. Mist the leaves occasionally to maintain humidity, but allow some air circulation to prevent fungal issues.
If you notice excessive condensation inside your plastic covering, briefly remove it to reduce moisture and prevent mold. As roots develop, gradually increase air circulation by venting the cover for longer periods each day.
Step 8: Check for Root Development
After the appropriate time for your cutting type, gently tug on a cutting. If you feel resistance, roots are developing. Most cuttings will show visible roots within two to eight weeks, depending on the plant species and conditions.
Some gardeners use clear containers specifically so they can observe root development without disturbing the cuttings. Once you see a healthy root system—at least half an inch of white roots—your cutting is ready to transition to soil.
Step 9: Transition to Soil
This step, called “hardening off,” should happen gradually. Move your rooted cuttings to a small pot filled with quality potting soil. Water thoroughly after planting.
Keep the new plants in humid conditions for another week or two, gradually reducing the plastic covering or dome. This helps them adjust to normal humidity levels before facing the less humid environment of a regular room.
Plant-Specific Tips for Growing Cuttings Successfully
Different plants have different preferences. Here are some specific guidance for popular propagation candidates:
Succulents: Succulents are forgiving and often root in just water or barely-moist sand. You can even let cut ends dry for several days before planting, which helps prevent rot. Once rooted, these hardy plants need very little water.
Herbs: Basil, mint, rosemary, and thyme all propagate beautifully from cuttings. Mint and basil are practically foolproof and can even root in plain water on a windowsill. Rosemary takes longer but is worth the wait.
Tropical Houseplants: Pothos, philodendron, monstera, and rubber plants root readily in water or moist medium within two to three weeks. Bottom heat accelerates rooting.
Hardwood Shrubs: Roses, hydrangea, holly, and lilac often require hormone and patience. These typically root best in winter with bottom heat applied in spring.
Evergreens: Many evergreen shrubs and trees propagate from semi-hardwood cuttings taken in late summer. A propagation chamber with consistent humidity and temperature produces the best results.
Troubleshooting Common Propagation Problems
Even experienced gardeners encounter challenges. Here’s how to address common issues:
Cuttings Are Wilting or Dying: This usually indicates insufficient humidity or the cutting dried out. Increase humidity by ensuring your plastic covering fits well, and mist more frequently. Check that your rooting medium is moist but not soggy.
Rotting at the Base: Excess moisture and poor air circulation cause rot. Reduce watering frequency, improve ventilation by briefly removing the cover, and ensure your rooting medium drains well. Consider adding more perlite to your medium.
No Root Development After Eight Weeks: Some plants simply take longer. Ensure you’re providing adequate light and warmth. Bottom heat can help. If using rooting hormone, try a different brand. Some cuttings simply won’t succeed—this is normal, and even experienced gardeners see failure rates.
Mold or Fungal Growth: This indicates excessive moisture and insufficient air circulation. Reduce humidity slightly, increase ventilation, and consider applying a light fungicide if problems persist.
Roots Developing But No New Growth: Be patient. Once roots establish, shoots typically follow within weeks. Ensure adequate light, which fuels photosynthesis and shoot development.
Caring for Newly Established Plants
Once your cuttings have rooted and transitioned to soil, they need proper care to establish as strong, healthy plants.
Water your new plants when the top inch of soil feels dry. As they grow and develop stronger root systems, gradually reduce the frequency of misting or humidity domes.
Place them in bright, indirect light. Many newly rooted cuttings benefit from a few weeks in a location with gentler light before transitioning to their permanent home.
Begin a gentle fertilizing program once you see new growth. Use a diluted, balanced fertilizer every two weeks. Young plants need less nutrition than established plants.
After four to six weeks in their new containers, most rooted cuttings will be ready for larger pots if they’re growing vigorously. Watch for roots emerging from drainage holes, which signals it’s time to pot up.
Conclusion: Start Your Cutting Propagation Journey
Growing plants from cuttings is a rewarding, accessible way to expand your garden, preserve beloved plants, and share greenery with others. The process requires patience and attention to detail, but the satisfaction of nurturing a tiny cutting into a thriving plant is incomparable.
Start with easy plants like pothos or mint if you’re new to propagation. These forgiving species will build your confidence and help you understand the fundamentals of growing plants from cuttings. Once you’ve succeeded with these, challenge yourself with more difficult-to-root species.
Remember that not every cutting will succeed, and that’s perfectly normal. Even experienced propagators see failure rates. Each unsuccessful cutting teaches you something valuable about conditions, timing, or technique.
With the knowledge you’ve gained in this guide, you’re ready to begin your propagation adventure. Gather your supplies, select a healthy parent plant, and take those first cuttings. You’ll be amazed at how quickly a small snippet of green can transform into a new, independent plant—and how this one simple technique can transform your gardening experience forever.
Happy propagating, and enjoy the incredible plants you’ll grow from cuttings!